I've had a request! I can hardly believe it! You don't know how big I was grinning when I read the request to post my bread recipe on my blog! That, my friends, means you've been reading....and THAT, my friends, is a good thing :) Thank you! :D It's the little things that make me happy ;)
And emoticons. I do that. Too much. If it offends your eyeballs, my apologies. If you know some good ones, let me in on that!
Anyway...Bread.
It goes like this...
And emoticons. I do that. Too much. If it offends your eyeballs, my apologies. If you know some good ones, let me in on that!
Anyway...Bread.
It goes like this...
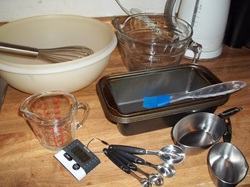
These are the things you'll need:
1 Extra Large Bowl for mixing
1 Large bowl for dry ingredients (I use my 8 cup measuring cup)
1 small measuring cup
a whisk
measuring spoons and cups
4 loaf pans, greased
kitchen timer
a clean work surface
1 Extra Large Bowl for mixing
1 Large bowl for dry ingredients (I use my 8 cup measuring cup)
1 small measuring cup
a whisk
measuring spoons and cups
4 loaf pans, greased
kitchen timer
a clean work surface
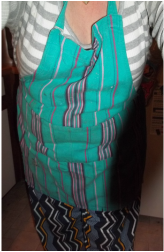
Don't forget your apron. Mistmatched stripes are optional.
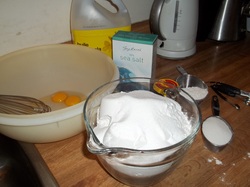
In the large glass bowl I have combined:
8 cups all purpose flour
1/2 cup sugar
2 Tablespoons instant yeast
1 teaspoon salt
*keep aside an additional 1/2 cup-3/4 cup flour for dusting and adding as needed*
8 cups all purpose flour
1/2 cup sugar
2 Tablespoons instant yeast
1 teaspoon salt
*keep aside an additional 1/2 cup-3/4 cup flour for dusting and adding as needed*
In the large mixing bowl combine the following:
2 large eggs
6 Tablespoons canola oil
Use your whisk to INCORPORATE the ingredients---YOU ARE NOT WHIPPING THESE!!
2 large eggs
6 Tablespoons canola oil
Use your whisk to INCORPORATE the ingredients---YOU ARE NOT WHIPPING THESE!!
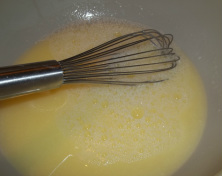
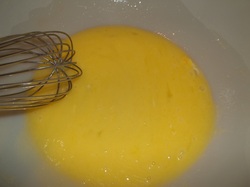
Warm the kettle to about 115 F and gently STIR 3 cups of water into the egg mixture.
It should look like light coloured eggs in water. You have to stir this together after mixing the eggs and oil so you don't end up with scrambled eggs...that is not what you're looking for.
It should look like light coloured eggs in water. You have to stir this together after mixing the eggs and oil so you don't end up with scrambled eggs...that is not what you're looking for.
Now, for the fun part!
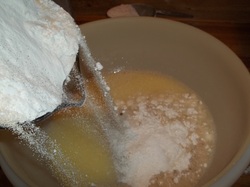
Pour about 1/3 of the dry ingredients into the egg, oil and water mixture.
Carefully now...you don't want to wear any of this, or have to clean it out of your hair. Remember, flour and water makes a glue of sorts...
Carefully now...you don't want to wear any of this, or have to clean it out of your hair. Remember, flour and water makes a glue of sorts...
Using your free hand, gently blend the dry and wet ingredients togther. Your hand should look somewhat like a hook. This makes it easier to mix the dough.
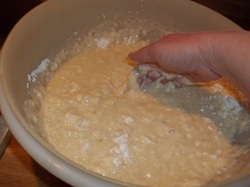
This is after adding the second 1/3 of the dry ingredients...
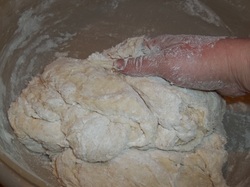
Add the last third...
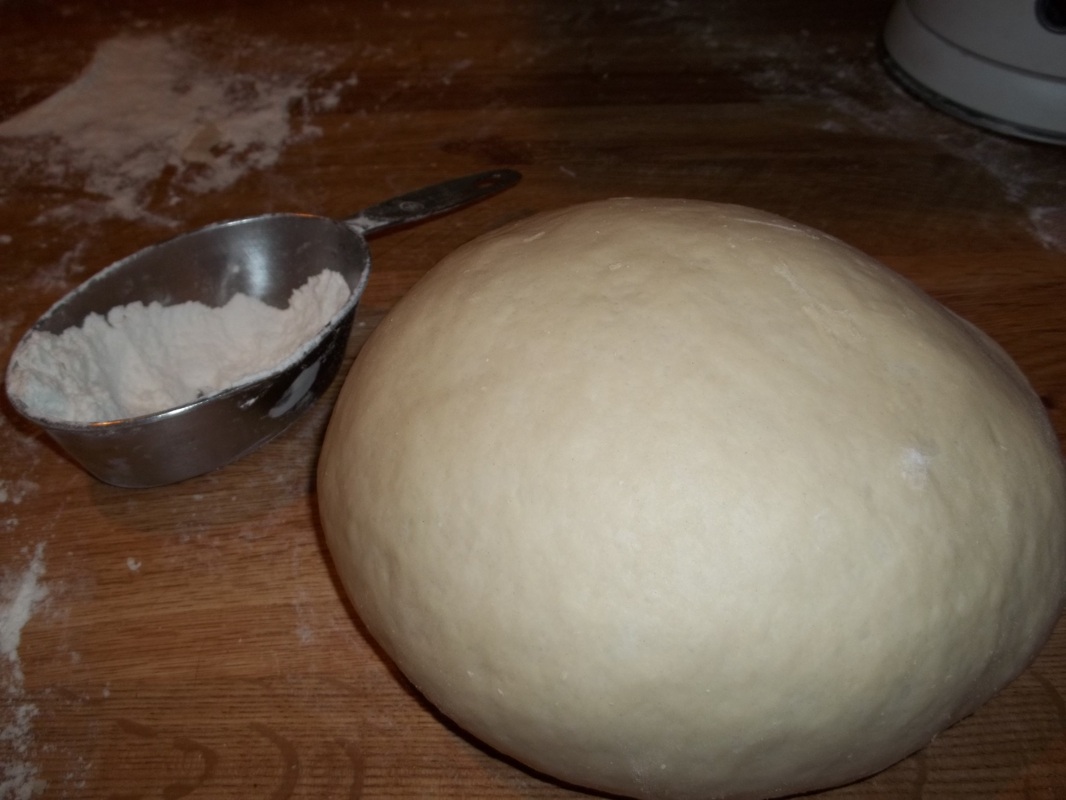
Mix the dough until it forms a rough ball in the bowl.
Mix the dough until it forms a rough ball in the bowl.
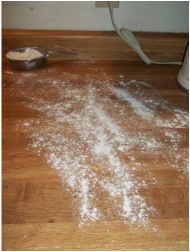
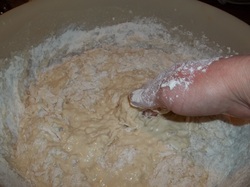
Turn it out onto a lightly floured surface, ready for kneading.
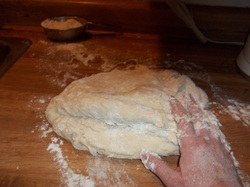
Kneading the dough stretches the gluten in the flour, producing a soft loaf. Pulling the dough from the top of the ball, push it back in on itself just up from the bottom edge, using the base of your palm. Give it a quarter turn, and repeat.
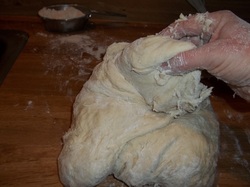
Another quarter turn, and repeat. Keep this up dusting the work surface and dough a little at a time until the dough is no longer sticky. It'll turn into a smooth and elastic ball.
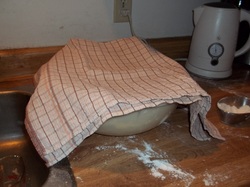
Return the dough to the bowl and cover with a clean cloth. Place in a draft free place for 15 minutes. It should double in size.
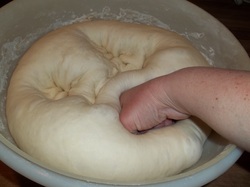
Feeling frustrated today? Angry at someone? Need an arm workout? Punch that dough down! Don't hurt yourself..but punch all the air out of it. Then cover it up again, and let it recover (rise) for another 15 minutes.
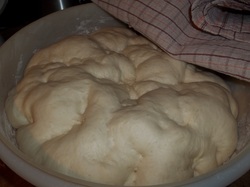
Now, it looks less like your smooth-teenage-skinned self, and more like ...well...you know..
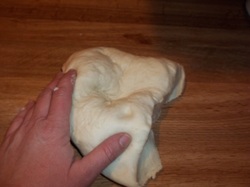
In a swift grabbing motion, grab a handful of dough, lop it off, and drop it on
your oiled work surface. It should be roughly 1/4 of the dough.
your oiled work surface. It should be roughly 1/4 of the dough.
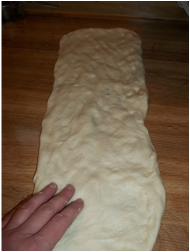
Using your fingertips, manipulate the dough into a rectangle, roughly 7"
wide x 17" long.
wide x 17" long.
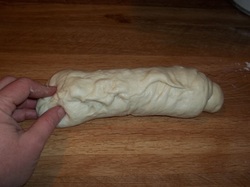
Roll up from short edge, pinching the seam and tucking in the ends. Be sure to do this smoothly to avoid air pockets in your loaf.
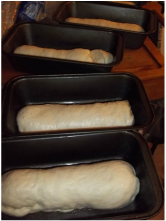
Place formed loaves into pans, cover and let rise for 60 minutes. About half way through rising time, preheat oven to 400 F. A nice warm oven makes awesome bread.
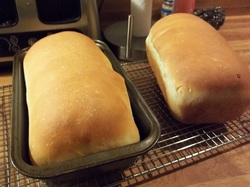
Bake for 15 minutes, until top of loaf is golden. Remove from the pan immediately. You'll know it's done when tapped on the bottom it sounds hollow.
Resist the urge to cut your loaf as soon as you take it from the oven! It has to sit and cool a while to come together. If you cut it now, it will deflate, and make you cry. DO NOT MAKE YOURSELF CRY!
Resist the urge to cut your loaf as soon as you take it from the oven! It has to sit and cool a while to come together. If you cut it now, it will deflate, and make you cry. DO NOT MAKE YOURSELF CRY!
If 4 loaves is too much to start with, this recipe is easily halved, yielding the same wonderful, moist loaf. If you want dinner rolls, cut smaller chunks, and roll into balls. Just remember that you want to make them about half the finished size.
This bread is great for slicing, as it doesn't leave alot of crumbs. Remember to use a long sharp serrated knife to slice your bread using long smooth slicing motions. It's a knife, not a saw.
Enjoy!
This bread is great for slicing, as it doesn't leave alot of crumbs. Remember to use a long sharp serrated knife to slice your bread using long smooth slicing motions. It's a knife, not a saw.
Enjoy!
 RSS Feed